Assembly Resin Kit (non-scale)
Sculpting by: Sakurako Iwanaga (Shokubutu Shojo-en)
【To Japanese language】
[Before Assembling the Kit]
* Before getting started, first make sure that none of the parts are missing.
If any parts are missing or damaged, please contact us using the details below as soon as possible.
Note that replacements may not be available due to the limited quantity available.
* Resin casts may contain some air bubbles or seam lines created during the casting process.
Please note that these parts are not considered defective.
* To fix warped parts, heat the parts in hot water or with a hairdryer.
(Be careful not to burn yourself.)
* This is a ready-to-assemble kit. Glue and paints are not included.
You need to purchase them separately.
[! CAUTION !]
* Be very careful when using crafting tools.
Pay particular attention not to hurt yourself with edged tools such as craft knives and nippers.
* Before using glue and paints, be sure to follow all instructions given by the manufacturers.
Be sure to follow all instructions, and keep the room well ventilated.
* Keep small children away while assembling the kit.
The small parts and plastic bags included are choking hazards for young children.
* This product is designed for ages 18 and older.
[Parts List]
:: Parts Overview 1 ::
 |
01. Left Arm 02. Right Arm 03. Belt Buckle Bracelet (Right) 04. Belt Buckle Bracelet (Left) 05. Shackle (Right) 06. Shackle (Left) 07. Key 08. Tiara 09. Right Shoe 10. Left Shoe 11. Right Leg 12. Left Leg 13. Apple 14. Collar 15. Body 16. Head 17. Front Hair 18. Back Hair |
:: Parts Overview 2 ::
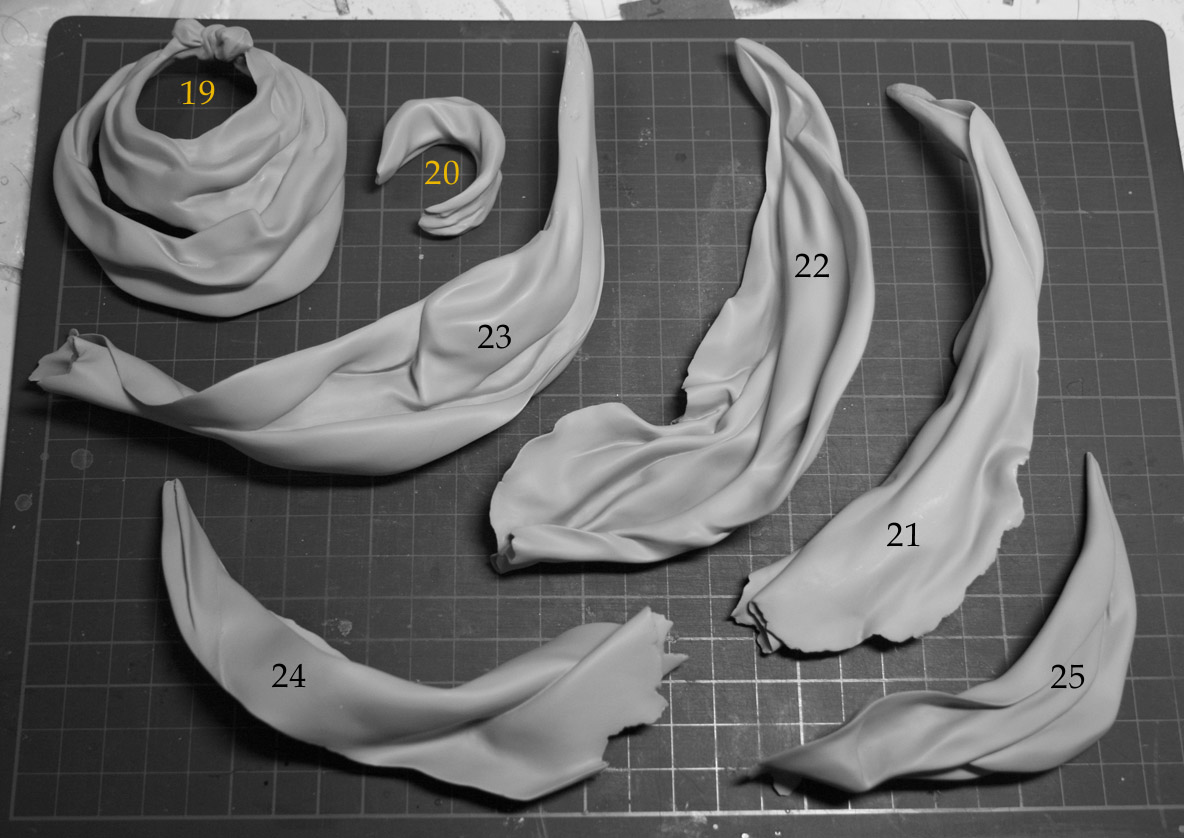 |
19. Cloth 1 (Upper 1) 20. Cloth 2 (Upper 2) 21. Cloth 3 (Right 1) 22. Cloth 4 (Right2) 23. Cloth 5 (Left 1) 24. Cloth 6 (Left 2) 25. Cloth 7 (Left 3) |
:: Parts Overview 3 ::
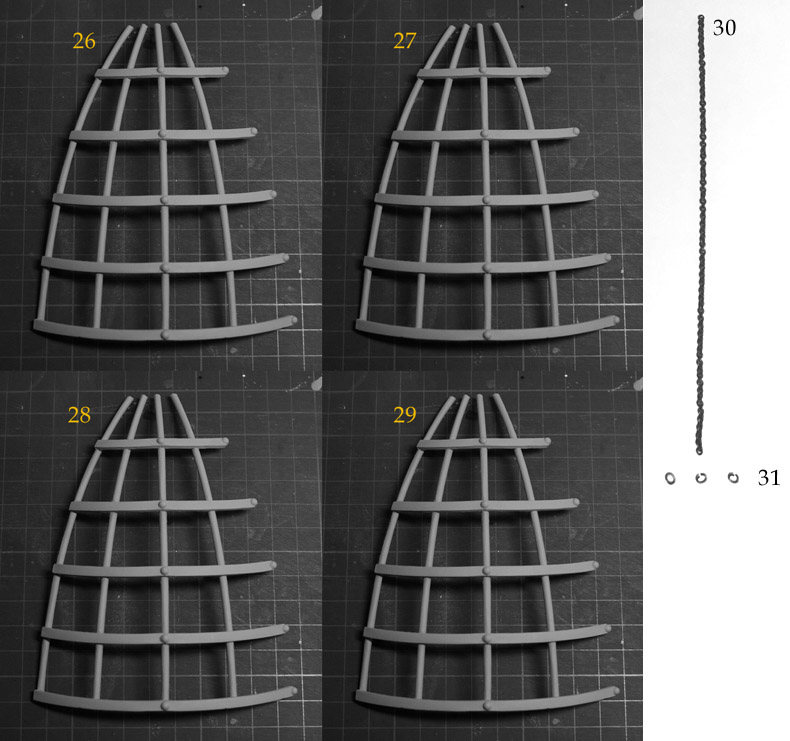 |
26. Crinoline 1 27. Crinoline 2 28. Crinoline 3 29. Crinoline 4 30. Chain (10cm) 31. C Ring (3 pieces) |
[Tips for Assembly]
:: Key in the Apple ::
* Cut the key into two, cutting slightly above the center.
* Drill holes into the apple using a 1.0mm pin vise.
(There is no need to penetrate all the way through,
just make shallow holes on the top and bottom.
Also make sure the top and bottom holes line up nicely.)
*Insert the cut key pieces into the holes.
You can trim down the length of the two pieces to the length you think looks best.
:: Leg Shackles ::
* Cut the shackles first, then place them on the legs and glue the cut ends together.
To obscure seams, make the cut next to the rings on the shackle.
* The Shackles have left and right parts.
The shackle for the RIGHT leg is marked with ‘R’ on its back.
* Use the provided C-rings to attach the shackles to the chain.
:: Bracelets ::
* The bracelets also have left and right parts.
* The part with a SINGLE belt is for the right arm, and the DOUBLE belt part is for the left arm.
:: Warped Parts ::
* Some parts may be warped by the heat of the casting process.
Simply apply some heat to these parts to soften, and reshape them.
* This allows you to make adjustments to the hair hanging over her chest, or the heels of the shoes.
:: Assembling the Head ::
* The head part and the back hair part don’t fit together easily.
You will need to adjust the back hair part until it fits in firmly.
:: To Restore the Texture of the Crinoline ::
* The crinoline may lose its rough texture when you remove the seam lines.
To restore this texture, dab on some lacquer putty thinned with lacquer thinner with the point of a brush.
The crinoline has a coarse texture, so roughly sanding it may help bring out the desired texture.
A slightly rough surface looks best for the crinoline.
* To create a metallic look, use silver as a base coat and black as a top coat when painting.
:: Position of the Cloth Parts ::
* Assemble the cloth parts on the left side.
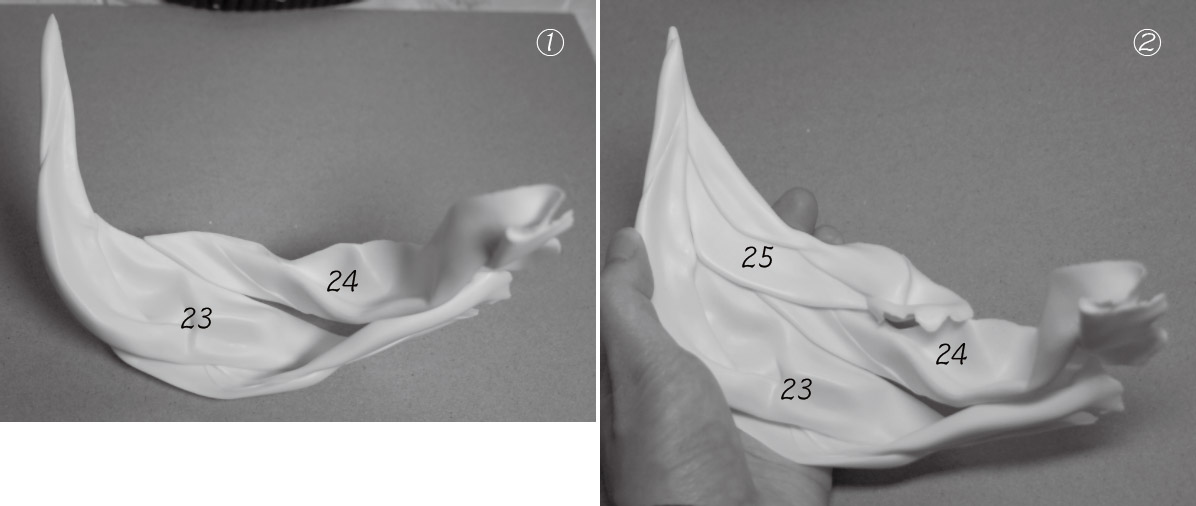
* Assemble the cloth parts on the right side.
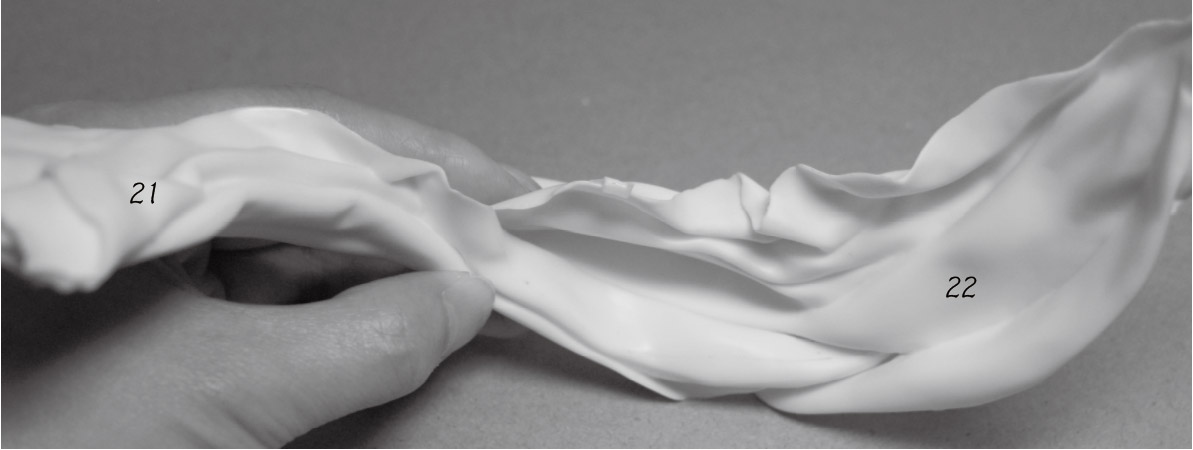
These parts do not need to fit together perfectly.
* Assemble the upper cloth parts.
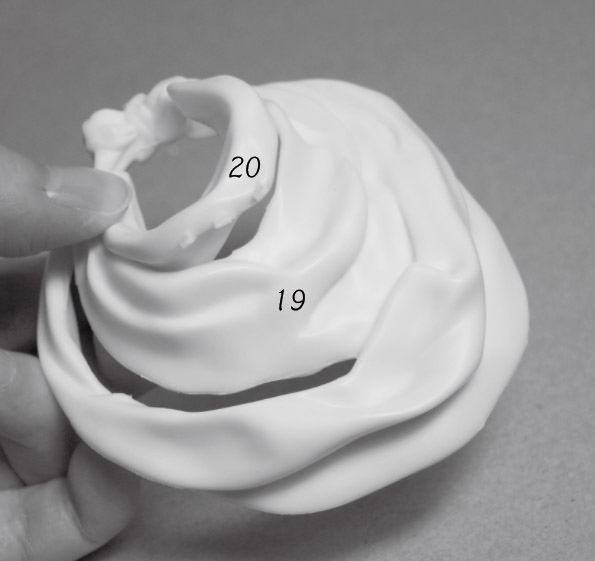
As pictured in the right photo, tilt the small part to attach.
If the pieces don’t fit together neatly, heat them and reshape accordingly.
:: Assembling the Crinoline ::

* Check that the parts are still keeping a round shape.
If not, warm them in some hot water or with a hairdryer to soften and reshape them so they form a round shape.
The diameter is about 14.3cm.
* Fix the warping as best you can, then assemble the parts together to create the round shape.
You may simply glue the parts together first,
but to prevent the glue from coming off while you are working on it,
insert 0.5mm brass wires into the joint areas.
The wires can be bent easily to reinforce the joints.
When all parts are fitted into place, glue everything together.
:: Attaching the Cloth Parts to the Crinoline ::

* You may simply just glue the crinoline and the cloth parts together;
otherwise you can use some brass wires to aid in assembly as pictured in the right photo.

* When attaching the upper clothes part to the crinoline,
trim the vertical bars of the crinoline a little to allow the cloth parts to fit.
(Be careful not to cut off too much.)
:: Assembly Sequence and Trial Assembly ::
* Trial assembly is VERY important.
This kit can be difficult to assemble,
so it's a good idea to do a trial assembly first to confirm the correct order in which the parts must be assembled.
For example, you have to attach the front hair part BEFORE attaching the left arm part.
Attach the upper cloth part (small) AFTER putting the body part and the upper cloth part (large) together.
Order Reference:
Assemble the crinoline → Attach the upper cloth part (large) to the crinoline
→ Put the body part through the upper cloth part (large)
→ Attach the legs to the body part → Attach the upper cloth part (small) to the upper cloth part (large)
→ Head → Right Arm → Front Hair
→ Left Arm → Back Hair → Right and Left Cloth parts
:: The Data of The Base ::
AI format for Adobe Illustrator(107KB)
JPEG format(471KB)
[Show the pictures of Melty Snow]